New GM TutorialNote: This tutorial will not tell you how to make your federation the best in the world, nor will it explain how to get people to work for you, or even how to recruit. This tutorial is designed to break down the mechanical aspect of being a GM so that you can better understand the tools you will have to use to make your federation function. It is up to you to discover the intangibles and make them work for you, such as Role Playing skills, charisma, leadership, and organizational skills.
=================================================================================================
Part 1: The GM PanelBecoming a GM is quite an achievement. And once you've been selected, you'll find you have a General Manager button just above your Log Out button. If you click that button, it will take you to a window that can seem daunting at first, but you'll quickly discover that the GM panel is essential to running your federation. Let's examine this screen, shall we?
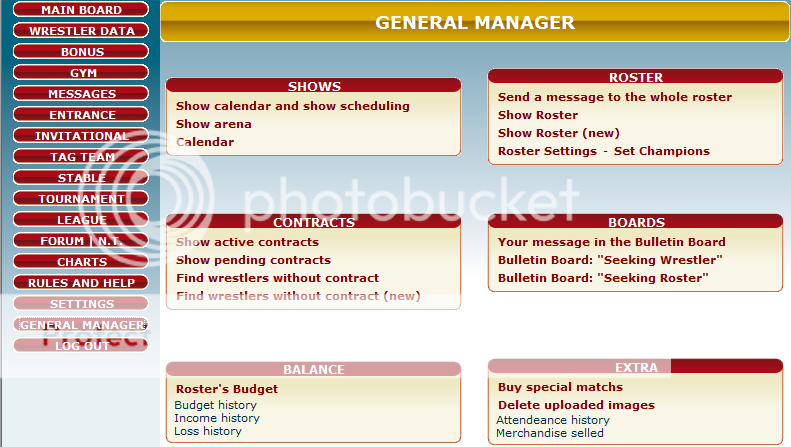
You'll notice several features that jump out at you, including options to find new wrestlers in need of contracts, manage your budget, and view your calendar. Given enough time to go through everything, you'd probably eventually figure out how most of it works. But this tutorial was made with the intention of saving you a little time and trouble.
Section 1.1: ShowsYou'll notice three links in the Shows section: Show calendar and show scheduling; Show Arena; and Calendar. At first, the first and third options may seem similar, but really they're not. We'll look skip to Show Arena first.
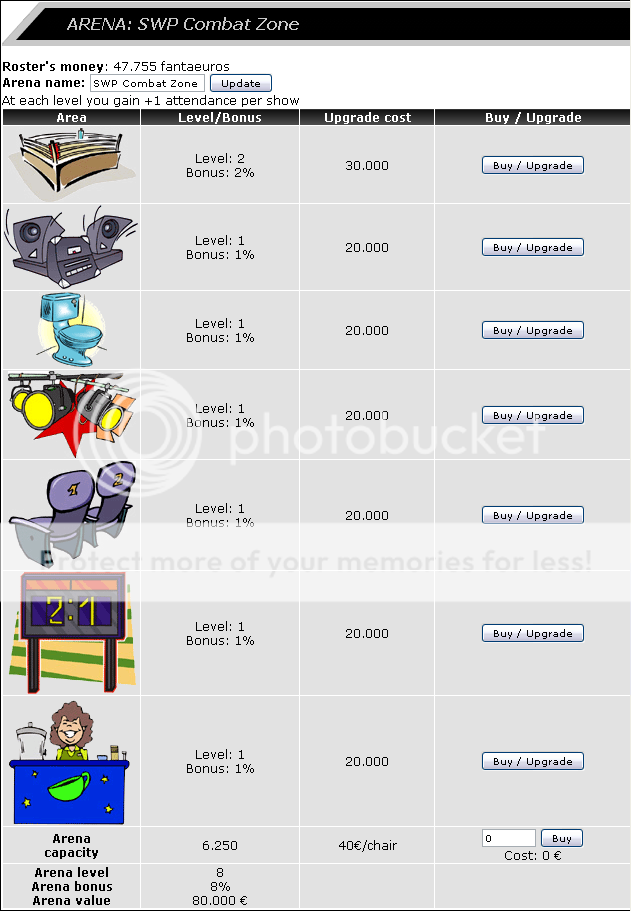
You'll notice that there is a field at the top to name your arena, seven areas you can improve on your arena, and a field where you can add more seats, as well as a display that shows how many levels you have upgraded.
Naming your arena has no actual effect. Upgrading your arena is supposed to increase your attendance at the shows. There is still some debate at to the actual effect of this feature. If you are going to upgrade any items, you should upgrade all seven before upgrading one a second time, because each level of upgrade costs €10,000 more than the last upgrade (i.e. Level 1 costs €10,000, level 2 costs €20,000 more, then level 3 costs €30,000 more etc.) Increasing the seat amount is pretty self explanatory. It costs €40 for each new seat. You should only do this if your shows are close to meeting your current capacity.
Next we'll look at the calendar link in the shows section on the main GM panel page.
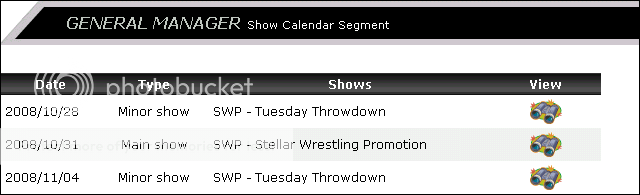
When you click on this link you will be taken to the same page that the calendar button on the FEDERATIONS take you to, with a list of confirmed shows for the day. Here you can browse dates, check past shows, and even see the cards of shows confirmed for the near future.
Last we'll look at the Show Calendar and Show Scheduling link This will take you to one of the most important screens you can have as a GM: your show's schedule.
Notice it has a list of all your shows for the season (it may take a few days to a week to get fully updated after the season starts). If we click one we are taken to the show creation screen.
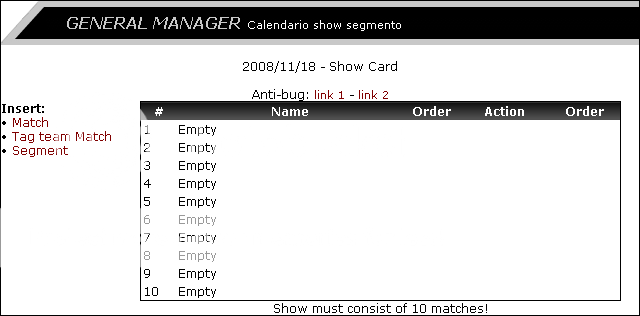
There are a few options on this screen. Match, Tag team Match, and Segment. If we select one of these options, we are in the show creation mode. Choose match first.
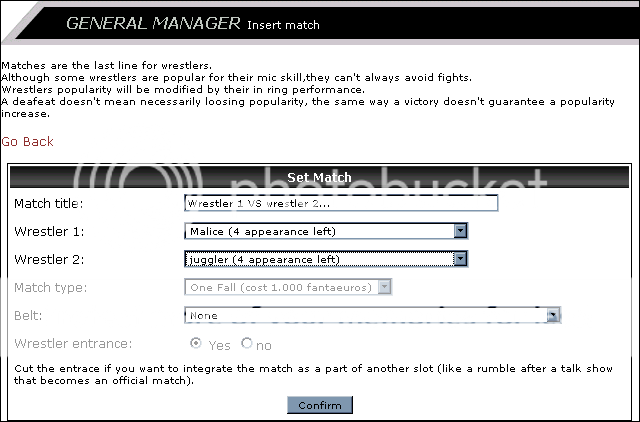
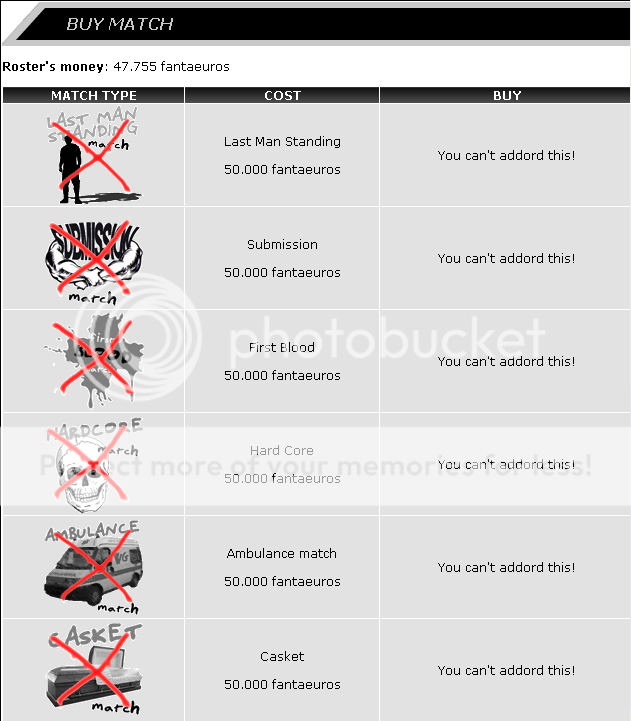
On this screen there are some drop down menus. The first empty field is where you can enter a brief match description, usually the participants. This will be the title that appears on your card. The next two fields have a list of all available wrestlers in your fed, and how many appearances they have left. Click on these to choose the participants of the match. Next is a match type menu. If you have purchased any matches, they will appear in this menu as an option. When you're first starting out, it is best to not purchase match types, and instead edit in the different match type stipulations using the match editor. If you want to use a special match, however, the costs are as follows:
One Fall 1,000
Last Man Standing + 5,000
Submission + 5,000
Hardcore + 5,000
First Blood + 5,000
I Quit + 10,000
Buried Alive + 10,000
Casket + 10,000
Ambulance + 10,000
Steel Cage + 10,000
Last Ride + 10,000
Last Blood + 10,000
Ladder + 10,000
The last menu is belt. This is a feature that is usually not used, as it is expensive, especially early on, and you can change the title holder's manually in another part of the GM panel.
Tag Team Match is identical to the Match creator, except you pick 4 participants, and can not choose an additional match type.
After creating a match, you will see it in the show page. From here, you can confirm it by clicking the

or delete it by clicking the

.
NOTE: If you confirm a match by clicking the it will be irreversible, and the match will be in the show if the show is confirmed. There is no way to delete a match once this is done.If you confirm the match, There will be a few options, and the match will appear much like a segment on the show creation screen, except it won't have a
button. We can view (

) or edit (

) the match the same as we would a segment. With that said, let's move on.
Now, let's click on the segments link. This will take us into the screen with which you will have the most familiarity by the time you are done as a GM: the editor.
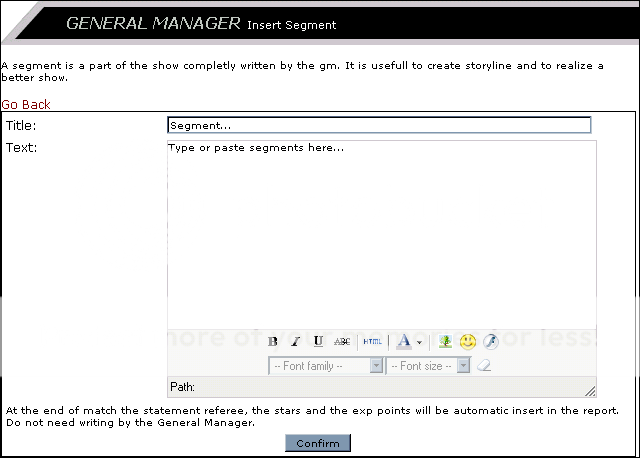
If you're in this screen after confirming a match, the only real difference is the big field in the middle won't be empty. But this powerful editing tool isn't exactly easy to use. The biggest feature is any text you copy from anywhere that is already formatted with color, font, and/or images will retain its format when pasted into the editor. This is exceptionally useful for pasting role plays or other segments where people have used a format into shows with less editing work for you or the VGM who is entering the segment.
You'll notice a line of buttons at the bottom of the editor pane. The first four are font editing buttons: Bold, italics, underline, and strike through. You can experiment with these fairly freely to gain a handle on how to format text within your show. You can also use the drop down menus at the bottom of the pane to adjust the font face and font size of the text. To edit color, click on the drop down arrow to the right of the

button and a box with color selections will pop up. Once a color is selected, the text you type will be that color. To change other text to a color, select the color from the box, then highlight the text by dragging the mouse cursor over it and click the
button.
To insert images, we have to go through a few steps. First, you need to make sure you have a copy of any images you want to use for your show stored locally on your computer or removable media. Then, click the

button at the bottom of the editor pane. It will bring up a window.
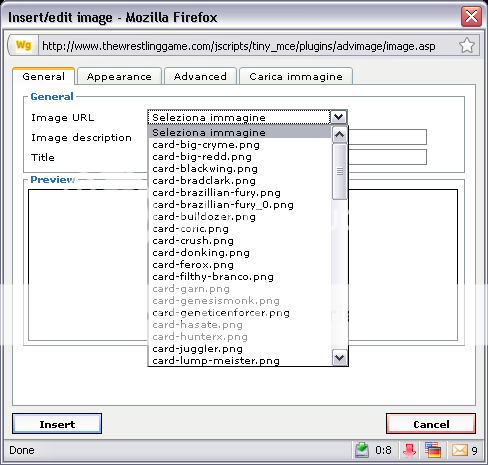
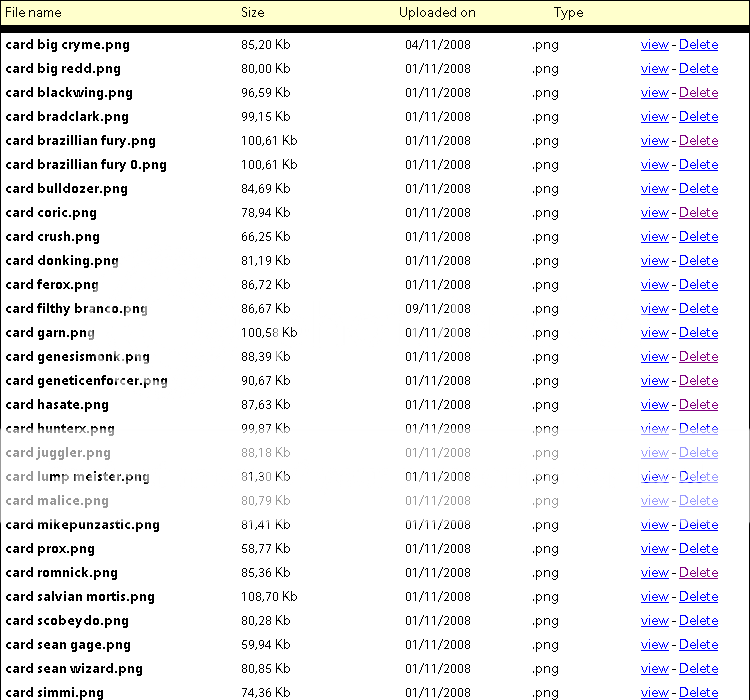
This is the insert image pane. Notice that there are several images listed in this list in the reference image. Yours will be empty. To populate this list, we need to click on the fourth tab, carica immagine. That will bring up the image upload tab.
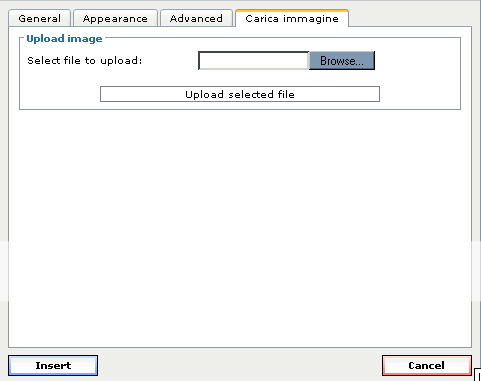
Click the browse button and choose the location of the images you want to use for your show. After you find the one you want, click on it, and click open. Then on the image upload tab, click on upload selected file. Unfortunately, you can only upload one image at a time right now, so you'll have to repeat this part of the process for every image you want in your show. Then we go back to the insert image pane, and click on the image we want to insert, and a preview of the image appears in the field at the bottom of the window. Click insert and you will get an error message about adding image descriptions. You can ignore this if you want, or add a description at your own discretion. While there are other options and tabs we can play with in the insert image pane, you can toy around with those on your own, as those are advanced options, and really aren't used very often.
Alternately, you can use the next tool to put images in the show as well, but I recommend this only for advanced users, as inserting HTML code is tiresome at best.
The last feature on this page that we'll discuss is the HTML editor. if you click the

button, it will bring up another pane. If you've been editing in a segment or match, this will be full of HTML code. You can use this pane to add or change anything about the segment you are on, though if you are not proficient in HTML, it can be very difficult. You should only edit in this editor if you know what you are doing. If you want to add a video from YouTube to your segment or match, you need to follow a few steps first. Go to the video page on YouTube.
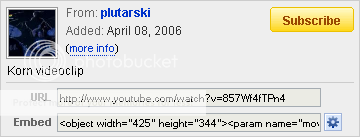
In the upper righthand corner of the page, just under the video description is a field called "embed". Click this and copy it. Now find the place in the normal editor you want to add your video. I find that putting a place holder like the word "video" works well for this (or some other word unlikely to appear elsewhere in the html text). Then open the HTML editor as discussed earlier. Now open the search pane (ctrl+f) and type (do
NOT copy and paste or you will have to go and get the YouTube embed link again) in your place holder. In Firefox, by default it should jump to the first instance of the word. In Internet Explorer, you'll have to type out the whole word and click the find first (or find next) button. When you have navigated to your place holder, delete it, and press ctrl+v (or right click on the spot you want to paste the video, and click paste from the pop-up menu). Now click the update button at the bottom of the HTML window. To ensure the changes have taken, click confirm. Then open the match or segment and click confirm one more time. HTML has a habit of not parsing properly if you do not confirm twice. If you do not believe me, click the view button after you confirmed it once to see the HTML string where the video should be.
Section 1.2: RosterFortunately, that was probably the most complex section of the GM panel. Next we are going to look at the Roster section, located in the top right. This area is pretty straight forward, and won't take nearly as much time or effort to cover. The parts of this section are as follows: Send a message to the whole Roster; Show Roster; Roster Settings and Set Champions.
First, lets look at the Send a message to the whole Roster link. It will bring you to what I call the "Mass message pane".
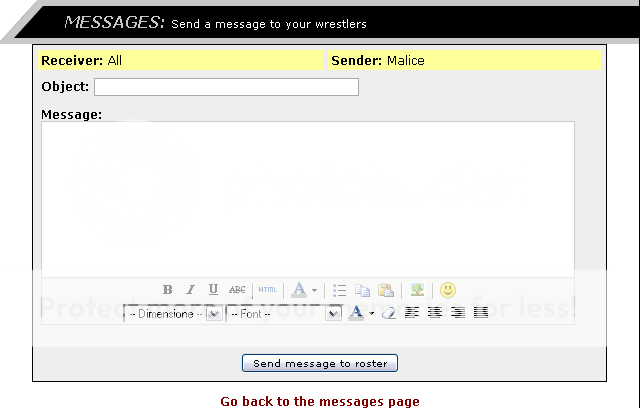
This is just what it says it is: A way to communicate with the whole roster at one time through messages in the game. Since these messages look like any other, it might be prudent to somehow identify it as a mass message so people don't think it is directed at them individually. This saves confusion, and helps avoid messages asking you to explain yourself from confused members of your federation. Simply type in the subject, then type in the body, and click "Send Message to roster" much like a regular message. Pretty simple, no?
The next item is Show Roster.
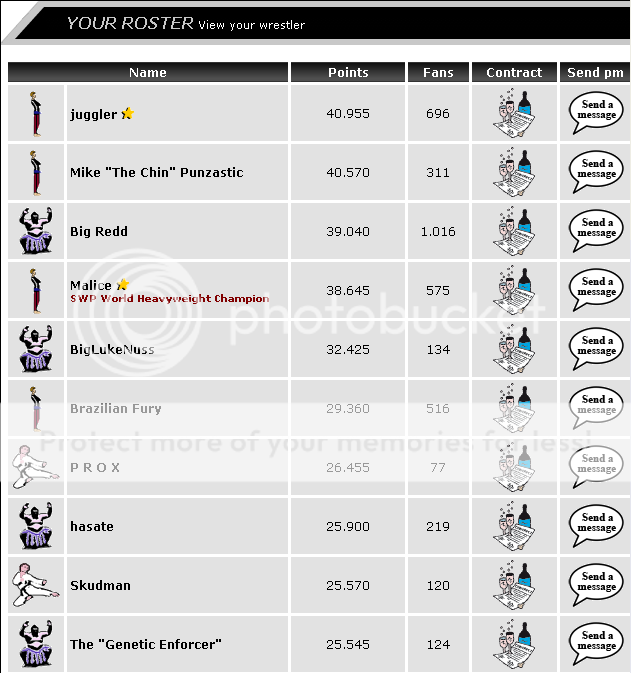
Another pretty straight forward section that gives you the entire roster, in order of wrestler score, and allows you to view their contracts, send them individual messages, and see their Wrestler Score and fan count.
The next link is Roster Settings.
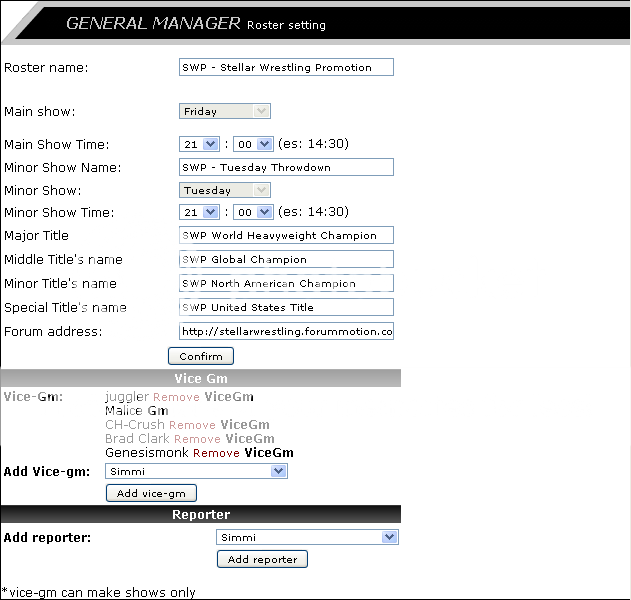
This is actually one of the first screens you'll have to see, as you'll have to name your fed and shows, as well as set the time and days for your shows. Setting a forum address is important as well, as it gives your fed a place to communicate outside of TWG in privacy to set up your shows. We'll discuss forums a little later. From this screen though, you can change your forum address, change the time of your shows and even the names of them. This is where you also set the names of your three titles. You can not change the day, except at certain specific times during the off-season.
This is also where you will set your Vice General Managers (VGMs) by clicking on the dropdown menu at the bottom and clicking the person's name you want to set as VGM, or set reporters to make reports of your federation's shows for others to read.
The last part of this section is Set Champions.
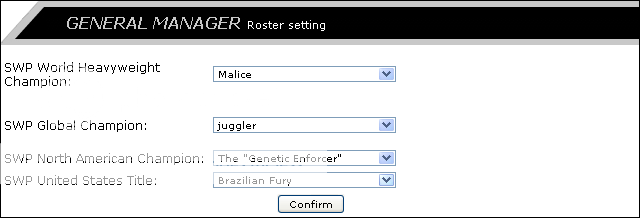
This is another fairly straight forward page. The four titles you set on the roster settings page will be listed here with the option to set anyone on your roster as the champions. Simply click the dropdown menu and select the champion.